Things have to come through the walls, roof, and floors — even in an airtight house. How do we detail these elements in a way that (1) keep bulk water out, (2) meets our ambitious (Passive House level) air-tightness goals, and (3) avoids risk of condensation? Here are my details.
Slab Penetration Details
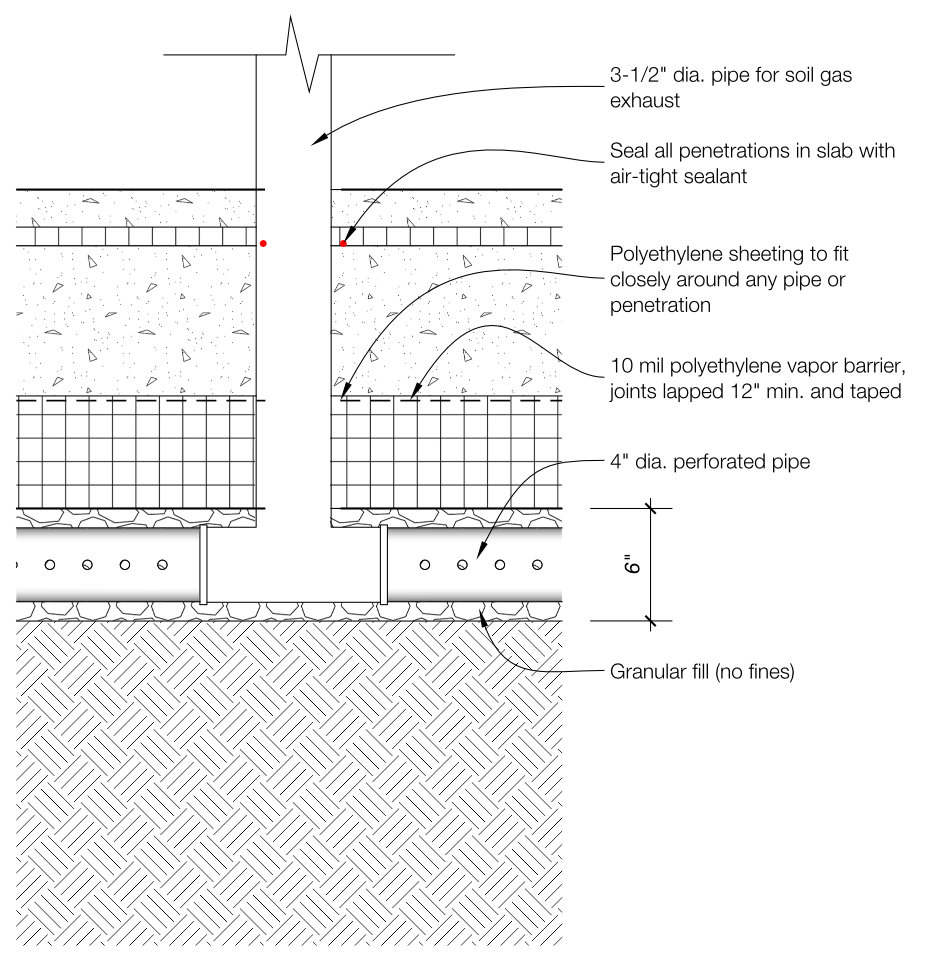
It turns out a ton of things had to come through the slab, including: plumbing, radon vent, fireplace air intake, and numerous sub-slab electrical conduits. The basic slab detail is below. The strategy is:
- Maintain the continuity of the air barrier. In this case, the concrete slab is the primary air barrier. Subsequent to the concrete pour we simply sealed around all slab penetrations.
- Bulk water is dealt with by the usual sub-slab details: gravel fill and footing drains to carry water away, and polyethylene sheeting directly below the slab to (1) prevent radon intrusion, and (2) provide a capillary break to prevent the slab from absorbing water like a sponge.
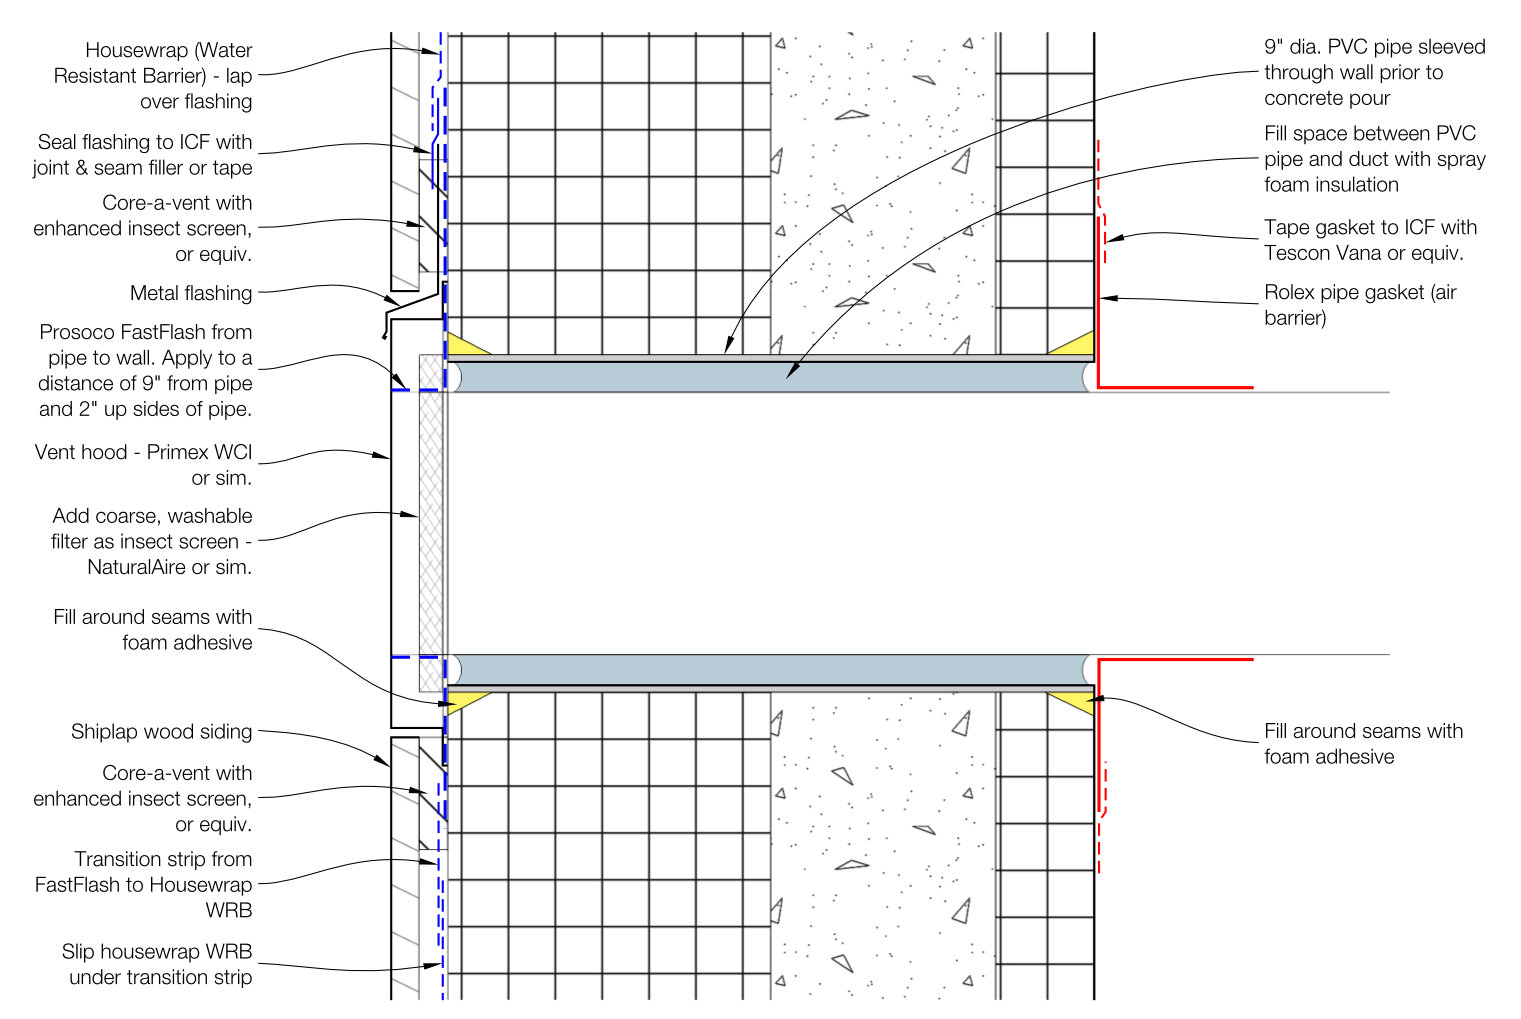
Wall Penetration Details
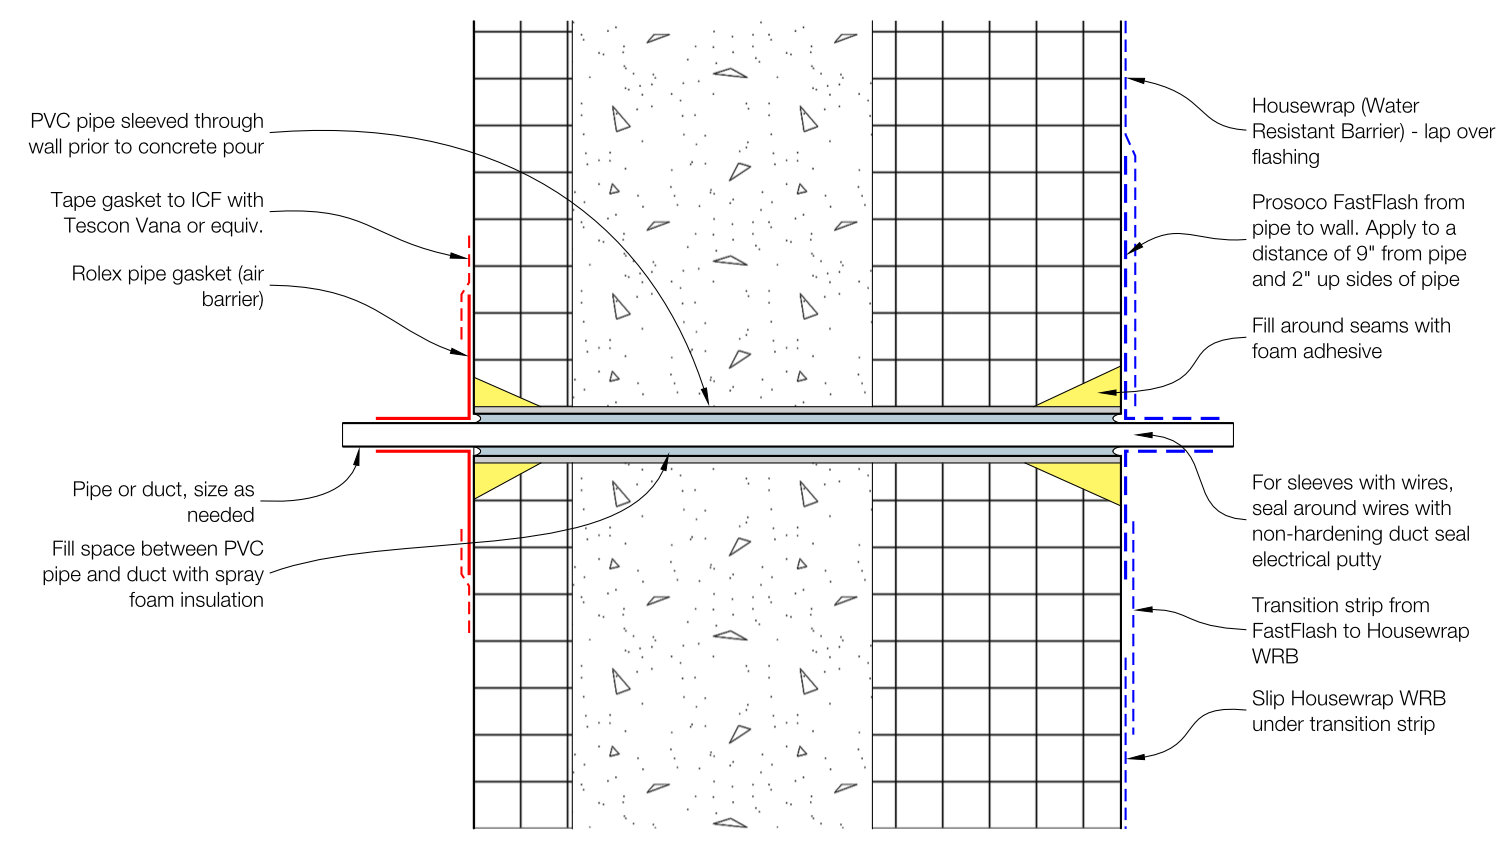
What comes through the wall? Plumbing for hose bibs, electrical for outdoor lighting and outlets, and a condenser line for a possible future mini-split. (Also the air intake for the wood stove, which I wrote about in a separate post.)
My typical details for these are below. The strategy was:
- Provide oversized sleeves through the ICF during the concrete pour, through which we later route plumbing or electrical. Trim these sleeves tight to the inner & outer surface of the ICF.
- Deal with bulk water on the exterior, using liquid-applied flashing or a membrane flashing collar would work too.
- Manage air-tightness on the interior, with a vapor-permeable pipe gasket from the pipe to the ICF. (Permeability is important here to avoid trapping vapor in the wall. I wanted the wall the be able to dry to the interior.)
The ERV detail (below) uses essentially the same strategy, with a bit more complexity to properly flash the vent hood (and add an insect screen).
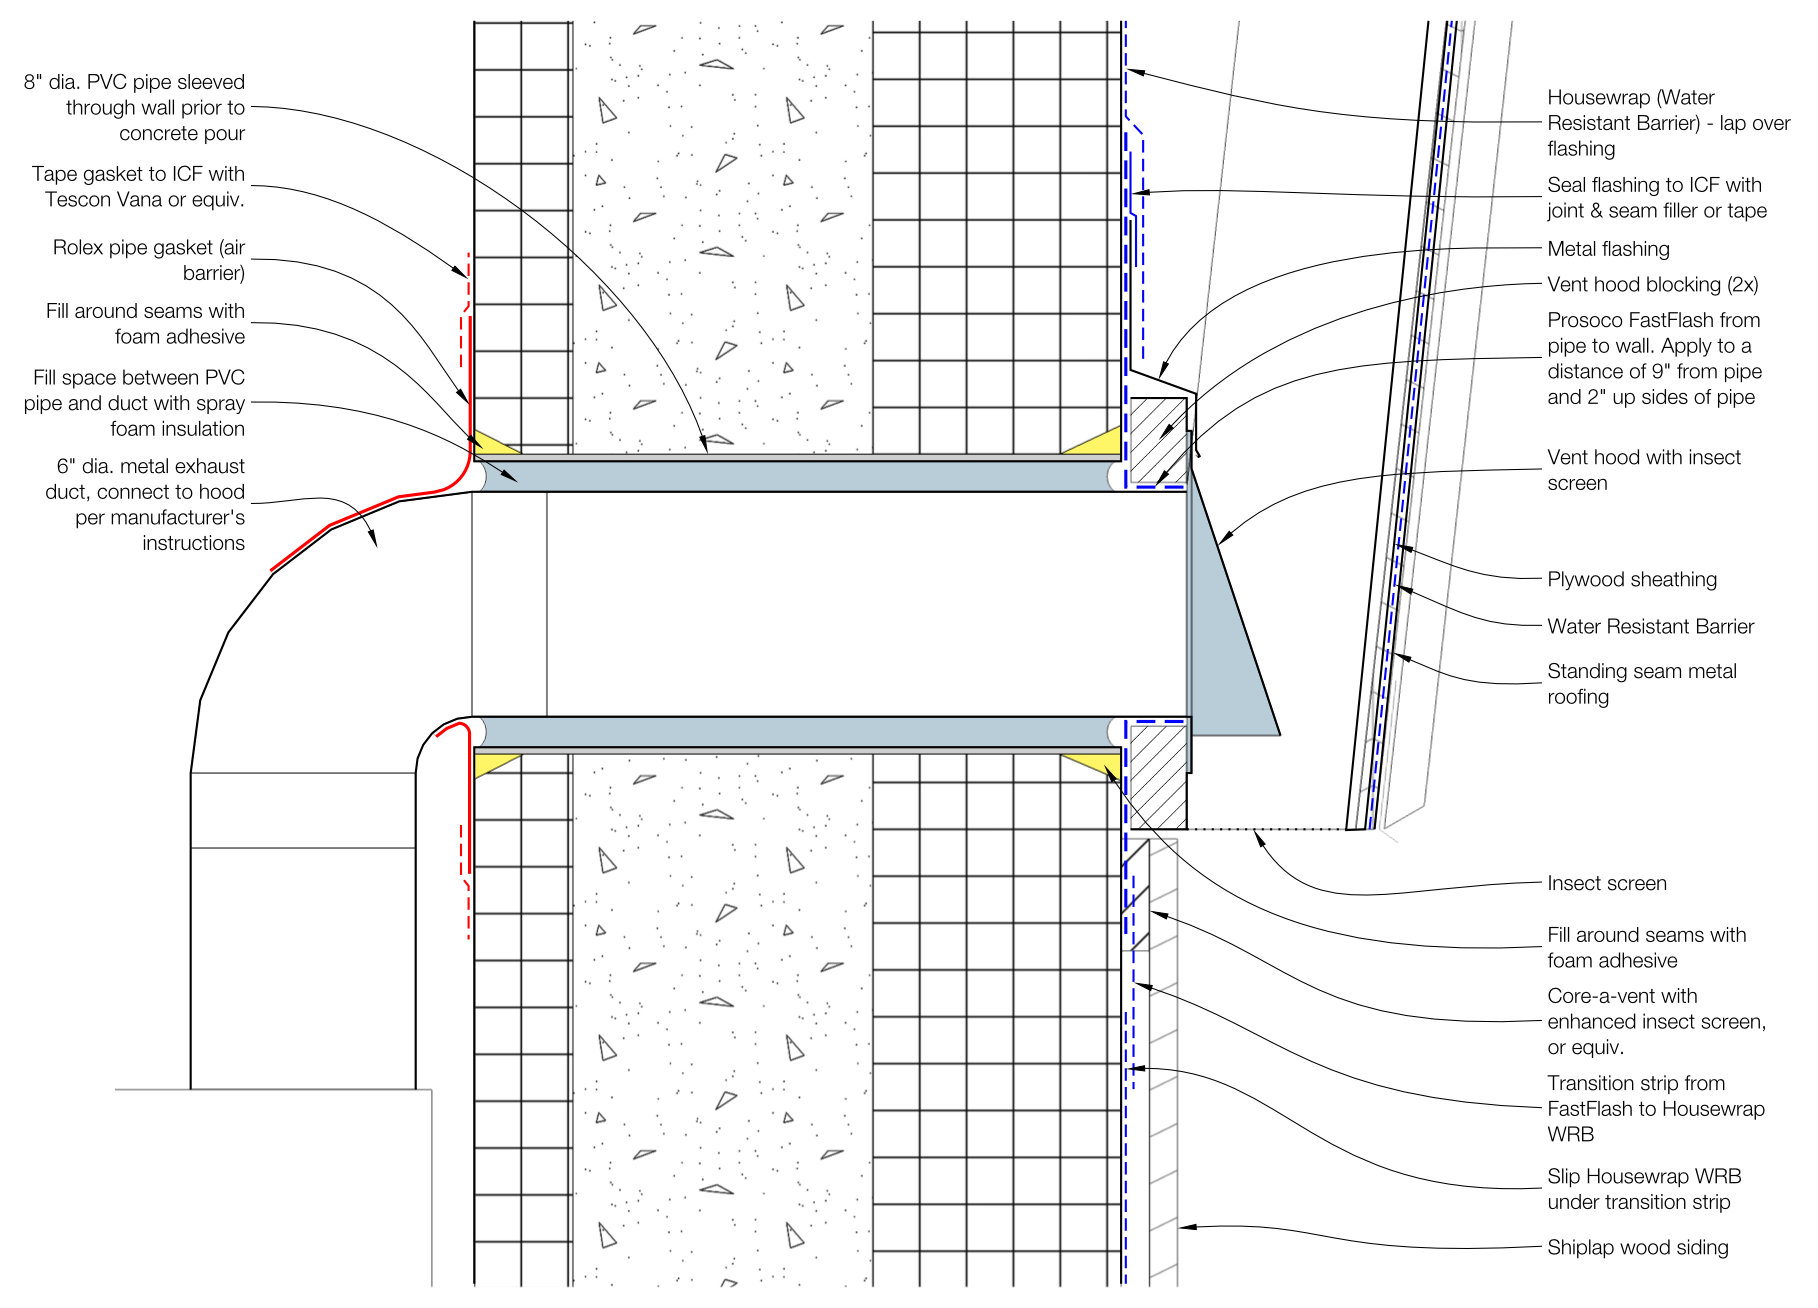
Kitchen Hood Penetration
The kitchen hood was somewhat of its own beast. Kitchen hoods are tricky in Passive Houses, because they un-balance the balanced ventilation system and can depressurize the house. If an exhaust hood is absolutely necessary (as opposed to a recirculating hood, which avoids this problem), best practice is to (1) select a hood with low air flow (300 CFM or below, which frankly is plenty for a residential kitchen—no need for a giant industrial hood, folks), and (2) provide make-up air when the unit is on. (In our case, the owners will simply crack a window. Not a good solution for a home where you expect ownership to change.)
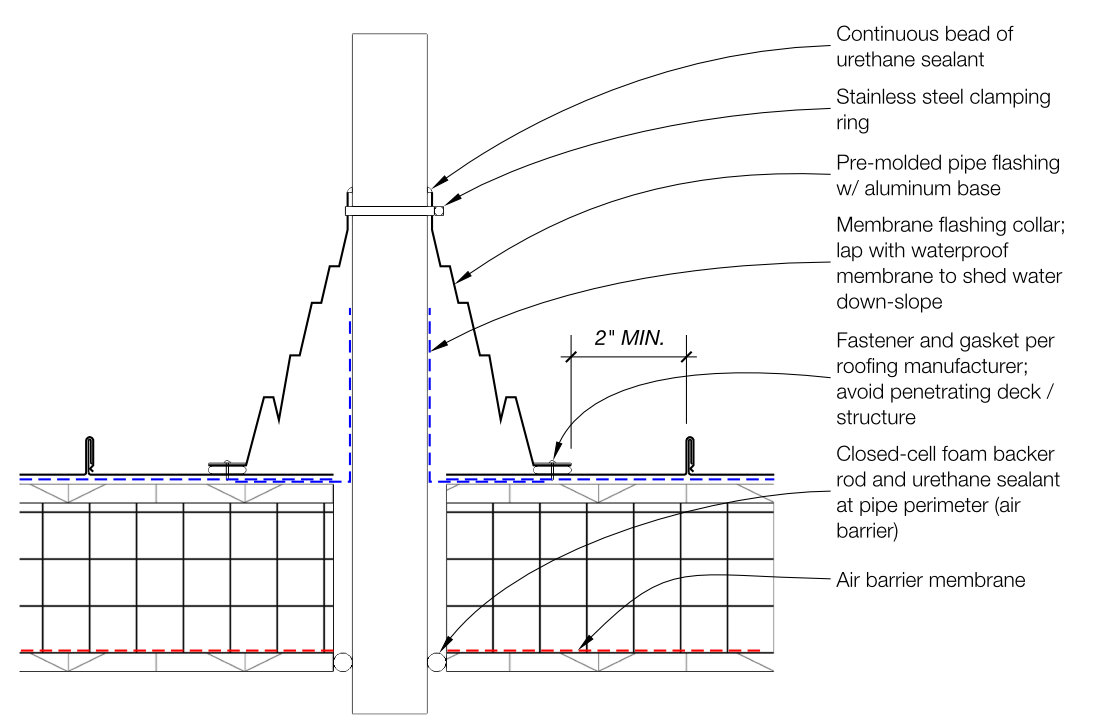
Roof Penetration Details
A number of things happen on the roof: radon pipe penetration, plumbing stack penetration, and solar PV installation.
For both the radon pipe and plumbing stack, the detail below implements the following strategy:
- Waterproofing uses a “belt-and-suspenders” approach of a membrane flashing collar below the standing seam metal roof, adhered to the waterproof membrane, AND pipe flashing above the metal roof.
- Air-tightness: the roof sheathing (and vapor-permeable air barrier membrane applied to it—specifically BlueSkin) is the roof air barrier. To maintain air-tightness, we seal the pipe to the sheathing using a backer rod and sealant.
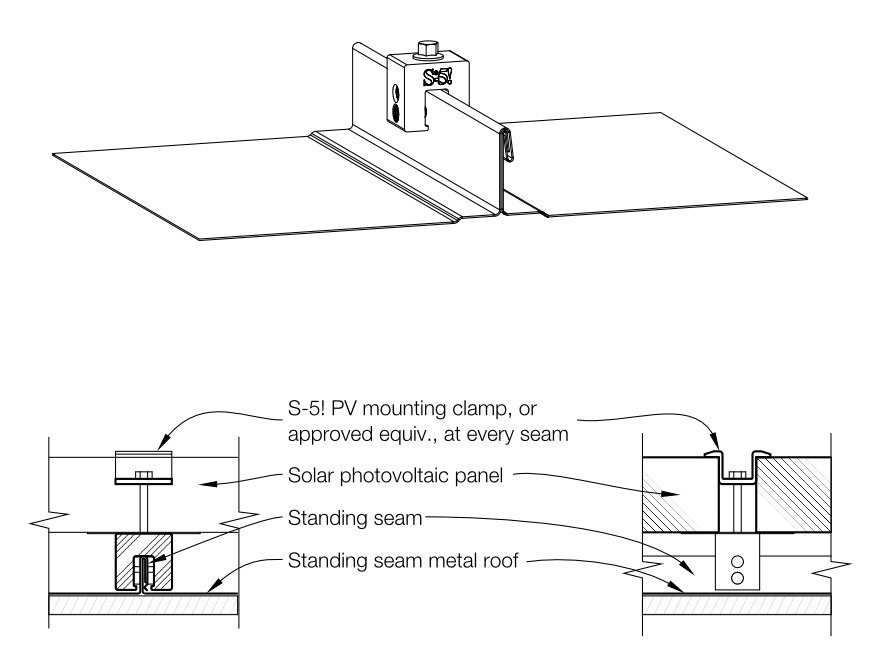
For the solar photovoltaic (PV) installation, the strategy was to avoid penetrations as much as possible by using S-5! clips, which are designed to secure to the ribs of standing seam metal roofs (see detail below). The electrical penetration for the PV will follow the typical roof details above.